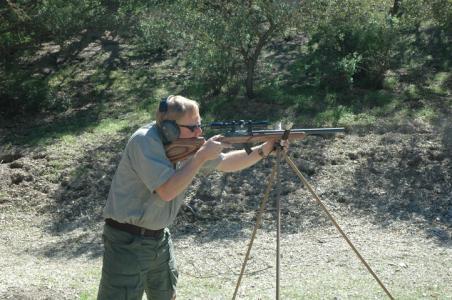
Getting your rifle ready for a hunt means putting in some quality range time and checking for functionality as well as accuracy.
Over the years I have hunted with a wide assortment of rifles, and I’ve seen all kinds of bizarre problems pop up. Most are fixable, but the most important thing is you need time to fix them. So the first rule in getting ready for a “big hunt,” whatever that means to you, is to plan ahead. Make your decisions on rifles and optics early in the process, so that you have time for at least a half-dozen range sessions before the hunt date rolls around.
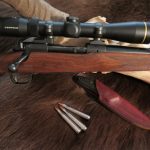
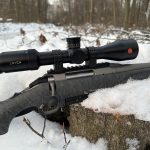
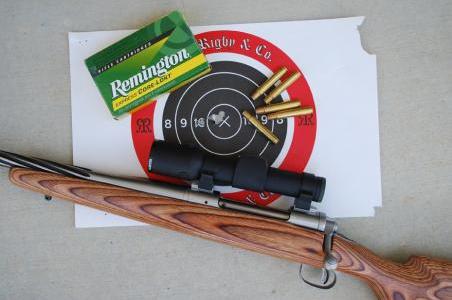
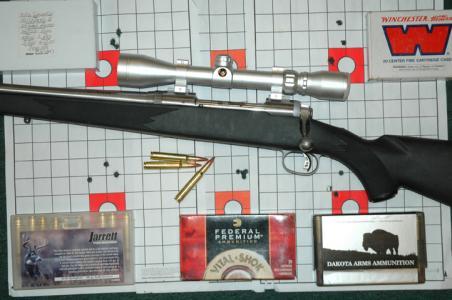
The exact zero you choose depends on where and what you’re hunting as well as your chosen cartridge. This .35 Whelen Ackley Improved is zeroed dead-on at 100 yards, a good choice for close-cover hunting.
For most of us this means months, but even if you have a range in your backyard and can shoot every day, don’t think you can cram for the exam. Especially if you’re setting up a new rifle for a hunt, you need time to work out the kinks. But even if the chosen rifle is an old friend, you need to check things out far enough ahead to allow time for a bit of gunsmithing, if needed, or even to come up with a backup plan. This is especially true if you’re going on an international hunt where you need to obtain a firearms permit ahead of time.
The first steps should be taken before you are committed to taking that particular rifle. Start by inspecting it carefully from butt to muzzle. If stocked in wood, are there any cracks? If the barrel is free-floated, as the majority of factory rifles are today, take a sheet of paper and run it between the fore-end and the barrel, making sure there’s clearance where there’s supposed to be. This can change; one of my own favorite rifles developed some warping in the fore-end, and I had to take some sandpaper to the barrel channel to regain clearance. Make sure the sling swivel studs are secure. You’ll need to inspect your sling as well, but sling swivel studs are a common point of failure, and if a stud pulls out (or your sling breaks) your rifle is in for a nasty fall.
Making certain the rifle is empty, check the safety for proper functioning, and check all the screws. Action screws should be tight, but not over-tightened, just good and snug. Scope mounts and scope mounting are among the biggest culprits. If you are mounting a scope yourself, please read the directions and follow them. If a scope is already mounted, then check all the screws. They need to be tight, but over-tightening remains a problem: if you break a scope mount screw, you’re in a pickle.
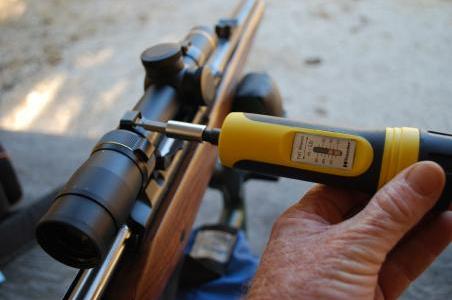
Scope mount screws need to be tight, and with torque wrenches so common today many instruction sheets suggest exactly how tight. About 30 pounds is usually plenty, and you definitely don’t want to overdo it and strip or break the mount screws.
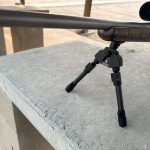
Now it’s time to go to the range, but that first session isn’t about accuracy. You can work on that later. The first concern is to make sure the rifle functions properly and consistently. Most of us single-load at the bench and that’s OK, but do at least some of your shooting from a full magazine so you can make sure the rifle performs its basic functions of feeding, firing, extracting, and ejecting, every single time. This applies to old friends as well as new ones because it’s always possible for parts to wear or break.
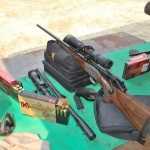
At some point you’ll need to make decisions on the perfect load for the game you intend to hunt, but initially it’s better to try as wide a variety of loads as you can get your hands on. The accuracy of most rifles varies at least a bit with different loads, and some vary a whole bunch. The most accurate load may not be the one you choose. You may opt instead for the performance qualities of a certain bullet that doesn’t print the tightest groups in your rifle, or you may compromise between accuracy and velocity.
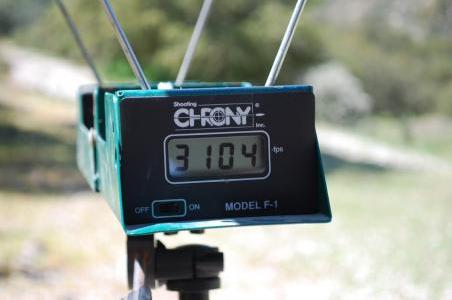
On any hunt that might involve long-range shooting it’s wise to check the velocity of the load you intend to use with a chronograph. That’s the only way you can know the real trajectory of your load.
This decision should be based on the game you are hunting. There are usually several perfectly sound options, so it takes a few range sessions to narrow the field. Eventually you will make your choice. You can continue to practice with other ammo that might be cheaper or more available, but once you’ve decided on the load you intend to use, several steps follow. First, especially with the current ammo shortages, make sure you have enough for the hunt, and a bit more for final zeroing. Then inspect every cartridge you plan to take on the hunt. Factory ammo is awfully good today, and I’m sure your handloads are as perfect as mine . . . but I’ve found the occasional crumpled case neck and even an upside-down primer. Take that ammo on your next trip to the range and run every cartridge from the magazine, into the chamber, and out into your hand and back into the box. Now you know all your cartridges will chamber, so set that ammunition aside until you’re ready to pack.
Practice as much as you can. If it’s a hard-recoiling rifle, ration yourself to just a few shots at each range session, but shoot a lot more with a light-recoiling rifle. All shooting is to the good, and there’s no better training tool than a good old .22 rimfire.
A rifle should probably be fired at least fifty times before taking it on a serious hunt, but perfectly good practice can and should be done with a .22. This saves money and also reduces the cumulative recoil you must deal with.
You should always check zero when you get to your hunting destination, but you still want to establish your zero with the load you intend to hunt with at least two range sessions before departure. Where that zero should be is another decision based on where and what you will be hunting. In some cases you may want to be dead-on at 100 yards, but you may choose a 200 or even 300-yard zero. That’s up to you, but don’t leave it until the last range session, and make sure you establish that zero with a cold barrel. By the way, if shooting at longer ranges is likely, check the velocity of your chosen load with a chronograph. That is the only way that you can be absolutely certain of your trajectory.
This is another point in the process where you might consider a backup plan. If it’s a distant “once in a lifetime” hunt, consider setting up a spare scope in rings. I don’t do this all the time, but there have been a couple of times when I’m glad I did. If you use detachable mounts, then the extra scope can be zeroed right along with the primary, but if you take a bad fall or your scope mysteriously falls apart and you decide to switch scopes, you will still need to check zero before continuing the hunt.
On that last range session you can start by checking that zero once more from a cold barrel. Then do whatever shooting you need to do. Hopefully you’ve been cleaning your rifle right along, especially if you’re breaking in a new barrel, but I like to clean the barrel one last time at the end of that final range session. Many rifles shoot to a slightly different point of impact when freshly cleaned, so after cleaning I fire a couple of “fouling shots.” Then I let the barrel cool completely and check zero one last time. Now your rifle should be ready. Hopefully you are as well.
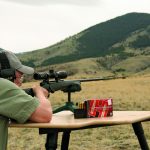
During your initial range sessions with a new rifle try as many different loads as you can get your hands on. Accuracy usually varies from load to load—sometimes significantly—but there are usually several good choices.