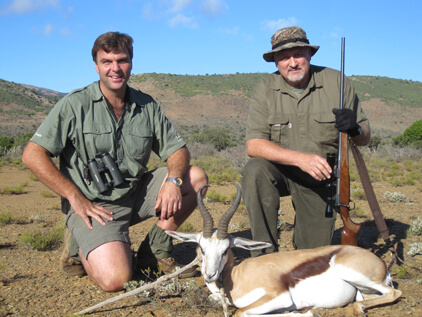
Sports A Field

Super-Safe Travel with Firearms

Tips and tricks to ensure your hunting guns arrive when you do.

To my knowledge, firearms have not been used in the hijacking of an airliner in decades Sportsmen’s firearms checked as legal baggage have not been involved in any airline hijackings since—well, ever.

Nevertheless, traveling hunters face ever more strict regulations for flying with the tools of their trade. The rules continue to vary from airline to airline, country to country, check-in agent to check-in agent. As suggested before in this column, one is best prepared to fly firearms by getting complete, written rules and regulations that apply to one’s destination country/airline. One’s outfitter ought to provide this. For in-country flights, one should scour his/her airline’s website for its latest baggage rules/restrictions. Print out those rules in case you need backup at the check-in counter.

For further backup, carry a printout of the latest TSA Web site regulations for shipping firearms and ammunition. Remember, TSA rules can be superseded by individual airline rules. For example, TSA permits the inclusion of ammunition in the same hard case as the firearm. Most airlines do not. You must abide by the airline’s rules. American Airlines, for instance, will not permit checked firearms on any flight going to or through the United Kingdom.

Interestingly, while TSA asks that regular checked baggage not be locked or be locked only with “universal master locks” that TSA can open, federal law mandates that firearms cases be not only locked, but locked with a device that TSA employees CANNOT open (non-TSA compatible master locks.) The idea is that once your firearms case has been checked by TSA, locked and place into the luggage system, no one should be able to access it. Great idea. To accomplish this, travelers are usually asked to carry their tagged firearm case to a TSA agent, lock it after the inspection, and retain the key. The traveler has the key (or combination,) not the TSA agent. In some airports, one is asked to lock the case at the check-in counter and wait while the case rides the luggage belt to a TSA inspection site where it is presumably X-rayed, sniffed, and chemically tested. Should a hand-check be warranted, TSA calls the airline desk, directing you to the appropriate TSA agent to deliver the key. Sometimes the agent takes the key to the TSA folks, sometimes those folks come get the key. But in all cases, the key must be returned to you.

The beauty of this system is that, once the case is declared safe, no one can easily tamper with it. No contraband can be inserted and your firearms cannot be removed. Federal law prohibits the placement of any markers or tags externally identifying the case as containing firearms, but most thieves can, of course, figure out what a firearm case looks like. Camouflaging options include using golf club cases (TuffPak) and any sort of hard-sided, lockable case such as a battered old, oversized Samsonite large enough to accommodate a dismantled gun. Pack foam or clothing around the parts.

Since a rash of thefts (mostly from O’Hare in Chicago around 2003), firearms have been sailing through pretty safely in obvious gun cases. Apparently few airport workers have the opportunity to slip away with firearms (the bigger and more obvious the case and firearm, the more difficult it is to hide and sneak out of an airport) and/or they fear repercussions from getting caught. Today’s job shortage should inspire most workers to value a steady paycheck over the bonus of a few fenced guns.

The combination of this locked security and the physical protection a hard gun case provides has inspired many to begin inserting other valuables in gun cases. Those without room in their carry-on for binocular, rangefinder, extra camera lenses, and even treasured books, expensive shoes and handbags believe such items are more secure in a locked gun case than unlocked, regular luggage.

More than a few experienced flyers believe that solidly locked firearms cases decrease the chances of “lost luggage” because airline workers don’t want to be responsible for an unaccounted-for firearm loose in the system. When they see those big, locked cases, they expedite their progress on down the line.

Generally, increased security means that checked firearms are less likely to be stolen or lost in today’s commercial flight world. Still, nothing is certain. If you insist on traveling with a particularly expensive firearm, consider buying additional insurance to protect it against any and all travel loss.

Leave a Comment

You can do this! How to afford your dream hunt

It just takes some planning.

You’ve been dreaming about doing a big hunt–a trip to Alaska, your first African safari–but pesky necessities like mortgage payments and utility bills keep getting in the way. Despite the rising cost of guided hunts today, determined hunters of modest means need not despair of participating in a far-flung adventure. Here are a few ways to start working toward that dream hunt:

  • Plan and prioritize. Just like anything else worth doing, affording a great hunt requires coming up with a plan to set the money aside and deciding that doing the trip is going to be a priority. Especially when it comes to physical hunts such as those for sheep and mountain goats, you’ll have a better experience if you prioritize saving for the trip in your younger years, rather than “waiting until you can afford it.”
  • Set up an automatic savings account that will set a designated amount aside each month to earn interest in your “hunting account.”
  • Cut out small expenses, such as that daily trip to Starbucks, and make sure that money goes into your hunting account.
  • Sell some of your old hunting gear or guns to help pay for your trip. E-Bay, Craig’s List, and other online emporiums make it easy.
  • Accumulate frequent-flyer miles with a miles credit card. Don’t run up your credit card just to get miles, of course, but if you use a credit card anyway you might as well be racking up airline miles. By the time you’re ready to book your trip, you might even have enough miles for a free ticket.
  • Apply for tags. Some premium elk and deer areas (and even sheep hunts) in Western states are open to do-it-yourself or semi-guided hunters, but it may take years to draw a tag. In states that offer preference points, it pays to start early and apply every year. In the meantime, gain valuable hunting experience and learn the country by purchasing over-the-counter cow and doe tags for public land where they are available.
  • Get on e-mail lists and mailing lists of outfitters and booking agents who offer “cancellation hunts.” You’ll have to be flexible enough to take such hunts on short notice, but the prices can be attractive.

Leave a Comment

Book ‘Em!

What you should know about hunt booking agents

If you want to hunt in an unfamiliar destination but aren’t sure where to begin or how to choose a reputable outfitter, start by contacting a hunt booking agent. The best way to ensure you’re working with a trustworthy one is to make sure he or she is a full-time agent with at least five years of experience and is a member of the American Association of International Professional Hunting and Fishing Consultants. Advice from a booking agent is free–it doesn’t cost you, the hunter, a thing, since booking agents are paid through commissions from the outfitters they represent. That means you have nothing to lose by making a call.

A good booking agent should be able to recommend hunts, countries, area, dates, and outfitters that fit your particular needs and desires. Even if you’ve always wanted to go to Africa but think such a trip might be financially out of reach, it’s worth contacting a reputable booking agent and being frank about your budget and time constraints. They’ll be honest with you if your expectations are unrealistic, and you might be surprised by what is available.

Leave a Comment

Guiding Lights

How do you know if the guide who takes you on your dream hunt is any good?

Have you ever been on an outfitted hunt where you suspected your guide had been the cook or maybe the wrangler the day before you showed up? Well, perhaps he had.

Turns out the title “guide” can be used rather loosely depending on where you hunt. In North America, there are no federal laws that define, test, or regulate hunting guides–and often no state or provincial regulations, either.

In other words, your guide could really have been the cook–or your outfitter’s brother-in-law, the local bartender, or some cowboy dragged in off the street. And it all would have been legal. Caveat emptor.

I once suffered nine days at the hands of a sheep guide who’d never guided a sheep hunter, never hunted a sheep himself, and never even touched one, dead or alive, unless you counted domestic woolies on his Dad’s farm. He stalked rams from below, sometimes with the wind at his back, and had a tough time deciding if any were legal. Needless to say, we did not get a ram on that trip.

Then there was the elk guide who’d just graduated from a guide school in Montana. He tied a mean diamond hitch and wore a pretty red silk bandana, but had yet to hunt an elk. Another time, following a shouting match with the outfitter, our guide walked out and our outfitter was later overheard whispering to the cook, “You ever guided for moose?”

Desperate times call for desperate measures. But how do make sure you aren’t the victim of those desperate measures?

Alas, not all guides are trained, experienced, rugged hunters, shooters, or even backcountry campers. Even “officially licensed” guides aren’t necessarily skilled outdoorsmen. Many western states, including Idaho, Montana, Colorado, Wyoming, and Alaska, test, regulate, and license guides through State Licensing Boards. Until a prospective guide passes the appropriate tests, he cannot legally guide hunters. In many, perhaps most, cases, however, the Board of Guides and Outfitters is more interested in keeping track of illegal guiding activity (guiding without a license) than guide competency. On the sixty-question exam, eight questions pertain to woodsmanship and game care, two to survival, one to firearm safety, nine to first aid, and thirty-eight to hunting and outfitting laws. This doesn’t necessarily mean a person passing this written exam doesn’t have good guiding skills, but neither does it ensure it. To my way of thinking, a Guide and Outfitter Licensing Board should test woodsmanship and hunting skills. To their credit, some do require proof of having taken and passed a basic first-aid class, so your guide can at least save you from frostbite after he gets you lost in the snow.

Lest you think I overplay this, here are the qualifications for becoming a hunting guide in Montana: the appropriate fee: $100.00; proof of current First Aid; current Montana Conservation License; completed application.

That’s it. Now, the Forest Service and Bureau of Land Management, both Federal agencies, specify certain requirements before guides are allowed to operate on their respective jurisdictions –mostly First Aid certification and demonstrated knowledge of property boundaries and land ownership. But nothing about how to recognize mule-deer browse or antelope territorial markers.

If any of this makes you nervous, you’ll love learning that most states allow private landowners, on their property only, to guide or to allow family or friends (with no qualifications whatsoever) to guide hunters. This isn’t necessarily bad. Grandpa might not be able to hobble more than ten yards from the truck, but there’s a good chance he’s seen mule deer bucks hide in the same sage draw for five decades. I’d rather be guided by him than a twenty-five-year-old kid who knows drop and drift tables for the ten most popular cartridges and can bone an elk in thirty minutes but doesn’t know where the game is.

To its credit, Alaska enforces the most stringent requirements on its guides, granting them licenses for Assistant, Class-A Assistant, Registered, and Master Guide based on the number of years they’ve hunted Alaska and/or been employed as hunting guides. In addition, they must provide lists of clients they’ve guided (references). This tactic recognizes and rewards the true proof of guiding competence—real-world experience. A Master Guide must have been licensed in Alaska as a Registered Guide or guide-outfitter for at least twelve of the previous fifteen years and provide a list of twenty-five big-game hunters he or she has guided personally. Rest assured, anyone who has survived that long as an Alaska guide knows his or her stuff.

However, and this is an important point, no degree of testing or licensing can create or guarantee a great guide. There are simply too many intangibles, too many loopholes, and too many qualities that can’t be tested. Ultimately, judging a guide’s ability to work well with and for you comes down to you, with a little help from your outfitter.

Your outfitter is responsible for hiring guides. You are trusting his or her judgment. If you know and trust your outfitter, chances are he’ll provide good guides. If you don’t know the outfitter well, ask who your guide will be, how experienced he or she is (and don’t denigrate women guides, who are some of the best), what her personality is like, and how he likes to hunt. The idea is to match yourself physically and philosophically with your guide. You don’t want a long-legged, impatient mountain climber if you’re a slow-and-steady, still-hunting kind of guy. Nor do you want a cowboy permanently glued to a saddle when you prefer to tiptoe through doghair timber and surprise an elk. Ask also about personal habits that might drive you nuts, such as high-volume snoring, smoking, excessive verbosity, or a sour outlook.

Most outfitters will try to match you to a guide, but few can guarantee your chosen Moses will still be around when you show up. Employee turnover can be fairly high at some outfitters, what with the hard work, long hours, and living cheek to jowl with other guides week after week. Still, if you discover your outfitter burns through a fresh set of guides every year, it might not be a bad idea to investigate the outfitter.

If you’ve hunted with a guide before or have had a trusted friend recommend one, specifically request THAT guide and write it into your contract. Hey, it’s your hunt. Why pay for something you’re not getting? In 2003 I hunted with guide Dawson Deveny at Canadian Mountain Outfitters in the British Columbian wilderness and appreciated him so much that I asked outfitter Bryan Martin for him specifically on a subsequent hunt. The kid is mature and wise beyond his twenty-seven years. He is tough, persistent, enthusiastic, solicitous, and sets a pace to match the hunter, yet he encourages and pushes when necessary to get a job done. Another outstanding young guide is Lance Kronberger, who recently started his own outfitting business, Freelance Outdoor Adventures in Anchorage. Like Dawson, Lance is not only extremely competent but optimistic and productive. The kid studies and knows sheep like a librarian knows the Dewey Decimal System. Not all great guides are young. During a Colorado elk hunt with Tenderfoot Outfitters I was fortunate to be paired with Tal Underwood. Roughly sixty years old, Tal danced up mountains with the best of them, maintained his enthusiasm despite wind and snow, and knew just where to go to get the drop on late-season, spooky bulls.

Despite the pessimism and warnings in this piece, most of today’s hunting guides do a difficult job extremely well. I’m regularly surprised and amazed at how they maintain the energy and positive attitude to deal with bad weather, broken equipment, stubborn horses, and griping hunters day after day after day. We probably have better odds of finding great guides than they do of finding great hunters.

Leave a Comment

Shootin’ Irons

Iron sights are still useful in some hunting situations.

I’ve written about iron sights before. It seems me that, in these days of almost universal scope use, shooting with iron sights is almost a lost art. This is regrettable for two reasons. First, in order to use iron sights properly, precision and consistency are required in centering the front sight blade or bead in the aperture or rear sight. It’s essential to see it the same way and do it the same way every time, or the shots can go really wild. These lessons absolutely apply to shooting with scopes or reflex (red dot) sights, so to my thinking an entire lifetime of shooting is enhanced by first learning to shoot a rifle with iron sights.

Most shooters of my generation started out with open-sighted BB guns and then .22s, used for some combination of plinking, more formal target shooting, and small game hunting. Regrettably, many kids of recent generations have started with scopes. This includes my own daughters, so that’s a failing on my part both as teacher and Dad. Iron sight to scope is an easy transition. Scope to iron sight is not so easy and, as I’ve written before, shooters with decades of scope use under their belts don’t suddenly wake up with magical proficiency with iron sights.

Iron sights are of essentially two types: Open; and aperture or “peep” sight. An open rear sight, customarily barrel-mounted, requires the eye to focus in three planes: Rear sight, front sight, and target. The aperture sight is easier on the eye because the rear opening or aperture can be “fuzzed out,” requiring the eye to focus on two planes: Front sight and target. This is generally a more precise sight because the eye naturally attempts to center the front sight in the aperture and, for older eyes, the two-plane issue is easier because the front sight is farther from the eye than the rear sight. (There are natural reasons why, at some point, most of us need reading glasses, but most of us retain reasonable distance vision). A properly focused scope allows us to superimpose the reticle over the target, requiring the eye to focus in just a single plane, at the target.

The aperture sight is actually an optical sight with the eye naturally centering the front sight in the opening. Precision is determined largely by the size of the opening; a “ghost right” aperture simply uses the larger hole with the aperture removed.

As our eyes age and the ability to focus in multiple planes decreases, quickly and properly resolving iron sights becomes more difficult. This is greatly aided by stock fit. Provided the rifle comes up on target it isn’t always necessary to perfectly resolve the iron sights, especially at close range. So, despite the limitations, I remain convinced that there are certain applications where iron sights are superior to scopes. Traditionally, in my mind, these have included hunting very large game at extremely close range—all elephant hunting and some extremely close-cover buffalo hunting; hunting in a driving rain or blinding snowstorm, where scope lenses are obscured almost instantly; and most hound hunting.

As with elephant hunting, in hound hunting the ranges are usually very short, so the problem is the “tunnel vision” created by use of a scope, but for different reasons. With elephant, and to a less extent a buffalo at very close quarters, there are two issues. First, seeing only a wall of gray or black in the field of vision, and thus having more difficulty rather than less in visualizing the aiming point. Second, with elephants the real danger is often from other elephants rather than the targeted animal, so peripheral vision is critical. With hound hunting the danger is twofold: Whether the animal is bayed or treed, the shot must be certain to preclude a wounded animal mixing with the dogs; if the animal is bayed, then the shot can only be taken when the dogs are absolutely clear, so peripheral vision is again critical.

In general I hold to these principles, but some recent experiences on the one hand reinforce—and on the other hand negate—these long-held concepts. In September I took what was, for many reasons, probably my last elephant. Back in 1985 I took my first elephant, using a .416 with fixed 3X scope. In 2015 I also used a .416, this one with a Leupold 2-7X turned down all the way. In between, for thirty years, all my elephants were taken with iron sights. This last elephant, taken in the Caprivi, was in some of most open country I have ever hunted elephant in. Just looking at the open grassland and scattered patches of cover, I expected an extremely long shot which, in elephant hunting, means maybe forty yards. The Rigby I carried had good iron sights, practiced with and zeroed, so I could have (and should have) removed the scope, but I didn’t. I drew a frontal brain shot at twelve yards, too close for optimum scope use. It worked, but validated my belief that iron sights remain superior for elephant hunting.

The next lesson came in Idaho toward the end of 2015. Donna and I were hunting cougar with veteran houndsman Bruce Duncan. Donna is competent with iron sights, but much more confident with a scope. She intended to use her extremely light MGA .270 with the 3.5-10X scope turned all the way down. Unlike many houndsmen, Duncan doesn’t insist on iron sights only, but he would have his old friend Gertie along just in case. Gertie is a well-worn ’94 Winchester .30-30, both stock and barrel shortened. It has accounted for hundreds of cougars and black bears in his thirty-year career. If I got a chance (only after Donna) I intended to use Gertie.

Donna’s cat treed in a very tall tree, only a sliver of vitals exposed and only with a near straight-up shot. Maybe the shot could have been taken with iron sights, but I’m really glad I didn’t have to try! Just a day later my own shot was even worse, taller tree, steeper angle, branches obscuring part of the chest. I could have hit the cat somewhere with iron sights, I guess, but Gertie’s front sight covered most of the cat and both branches I needed to get past. I switched to a scoped rifle; even though it was a close shot over hounds I needed the single-plane focus of a scope. So let me modify my long-held belief: Iron sights are suitable for most hound hunting, but not for all potential shots.

I suspect that few of us actually hunt with iron sights these days, but most of us have “auxiliary” iron sights on some of our rifles, and we have childlike faith in their strength and durability. My own M94 .30-30 is a short-barreled Trapper. Long fitted with a Lyman receiver sight, it has always been extremely accurate, but I don’t use it much. The other day I took it to the range and discovered (to my horror) that the aperture base was bent, and the strike at fifty yards was four inches high and three inches left.

Very few current iron sights are invincible, so if you intend to actually use them (or even think you might), make sure they’re zeroed with the same diligence you would zero your scope. This is one advantage to the popularity of the AR frame and the so-called “tactical” rifles: “Battle sights” tend to be extremely robust; sporting rifle iron sights are often surprisingly flimsy, in part because today’s makers often don’t expect that they will actually be used. In the case of my ’94, had I taken care to inspect it, the rear sight was visually bent; equally common is for front sights to bend and windage adjustments to be knocked out of kilter. The fix is simple: Retighten or straighten. Then it takes trial and error shooting. If the adjustments are in the rear sight, move the sight in the direction you want the strike of the bullet to move (right for right, up for up). With many battle sights, elevation adjustment is in the front sight; move the sight in the opposite direction you want the strike to move (up for down). Don’t ever take it for granted that iron sights are “on!”

Leave a Comment

Five Secrets to Successful Glassing

The very best binoculars won’t help you unless you know how to use them correctly.

We were very early in an Alaskan bear hunt. The area was good and the weather forecast was favorable. We had time, so we had no reason to be in a hurry. Our guide, Alisha Decker, had glassed a bear from two miles out, a tiny dark speck. Just to see the bear was an amazing feat of glassing, especially from a bobbing boat, but she had home-court advantage: She started hunting the beaches and coves of the Alaska’s “ABC Islands” with her Dad, Jimmie Rosenbruch, when she was seven, so she knows where all the gray rocks and black stumps are. Anything new and dark is likely to be a bear.

So we went in to take a look at the bear, and since this was Donna’s hunt, not mine, I had the luxury of objectivity. We were maybe a mile out before I could actually see the bear, and at about that distance I glanced back at Alisha, who was alternating between steering the boat and looking through her binocular, and I realized she was serious. We weren’t going in to look at this bear. We were going in to shoot him, if we could, because even at that distance, from an unstable platform, she already knew exactly what this bear was. We landed, made an approach, and shot the bear. His hide squared exactly ten feet, a bear you couldn’t pass on the first day, last day, or any day in between. Alisha saw this from an impossible distance.

I cannot give you pointers that will allow such feats of observation. But I can tell you that this is a classic illustration of one of the most important principles in glassing: The idea isn’t just to look; what is important is to see what you’re looking at. How many times have you perfunctorily scanned a hillside, proclaimed it clean, and then kept moving?

Good glass matters, but only if you really use it. I have seen local guides in the Third World–in Africa, Asia, and especially northern Mexico–perform amazing feats of spotting game with absolutely horrible optics. The real enemy of effective glassing isn’t the budget to buy better glass, but laziness and boredom. I freely admit that I have my limits; I can only sit in one spot for so long, and then I get antsy and have to move.

In some cases, that’s OK; for example, spotting white sheep and goats is pretty easy. But with animals that really blend in, like Coues white-tailed deer, there is simply no such thing as too much patience, and no such thing as looking at the same hillside for too long. The guys who are good at it may spend an entire day–and will certainly spend several hours–painstakingly glassing one ridge or valley. I do not pretend to be good at that kind of really serious glassing, but I have learned a lot from it. Coues deer hunting is the most optics-intensive hunting I have done anywhere in the world, so the Coues deer hunt is a great teacher for glassing, and here are some key lessons:

In West Texas, outfitter Hunter Ross takes a careful look for aoudad. This is pretty good glassing technique—nice and comfortable, with the binocular well-rested.

1. You gotta believe. In order to glass effectively you have to believe that what you’re looking for is there, and it’s simply your job to find it. This may be based on scouting, past experience, just the look of the country, whatever, but only if you have confidence that the game you seek is present can you have the patience to keep looking until you see it.

2. Persistence counts. The fact that the game is there doesn’t necessarily mean you can see it. Of course, the animals you’re looking for may not be there on that day, no matter how much faith you have. But they might well be there, but in a location or position where it’s impossible to see them–behind vegetation or in hidden folds in the terrain. So if you really think you’re looking in a very good place, don’t give up. Change angles if possible, and if you have multiple vantage points within reach, change times of day.

3. Movement, color, texture. Human eyes (like those of most predators) key primarily on movement. While it’s true that most animals are more active in the early morning and late afternoon, midday movement is more common than you think. Realistically, no matter how good you are (or how good your glass), most animals will be bedded in positions where they cannot be seen until they move. This also speaks to patience and persistence! However, the human brain does offer other advantages. Unlike most animals, we see colors very well, and we are also able to see textures and the slight differences in reflection between, say, a horn or antler and a branch or rock. When glassing you are always looking for even the slightest clue, and only rarely will it be a complete animal.

4. Get comfy and take a rest! If you are standing up and glassing then you’re really just going through the motions. You aren’t completely steady, and your optics are magnifying your wobbles. You can see animals that are fairly close or relatively obvious, and perhaps you can get a better look at something you’ve noticed with your naked eyes, but you are very unlikely to discover anything new until you rest your optics, no different from shooting a rifle at longer ranges. If there’s a small object or area that you want to see better you can rest against a tree or over the roof of a vehicle, but if you really want to glass, then you need to get comfortable. I like to find a spot where I can sit down and rest my binocular over my knees. That is very comfortable and very effective for me, but even that isn’t the most serious glassing. The guys who are really good at it, like my Coues deer hunting mentors, can pick apart an entire mountain, piece by piece.

Coues deer guides are looking for a very small and indistinct deer in very big country, so they tend to use big optics. For finding game, binoculars are always better than spotting scopes because of the eyestrain from using just one eye, but the Coues deer finders put powerful binoculars–15X, 20X, more–on steady tripods. They’ll get comfortable–often carrying backrests and cushions–and glass for hours. Depending on your country and what you’re looking for, a standard 8X or 10X binocular may be plenty, and under your conditions your knees may work as well as a tripod.

5. Establish a system. Establish a pattern of how you glass, and stick to it. Long-time Coues outfitter Kirk Kelso is as good as anyone I know. He picks a “panel” on a ridge, usually starting at the top and then working down, but that depends on the light. When he feels he has actually seen that panel, not just looked at it, then he moves to the next panel. When he’s done he might move to a different spot, but he might also go right back to the beginning and start over, because the light will have changed and animals might have moved. The important part here is to establish a consistent system so that you not only look at (and try to see) the entire piece of country before you, but you also devote more or less equal time to glassing each nook and cranny.

Unfortunately, in our affluent and technological society we tend to think that we can buy expertise by simply getting better and more sophisticated equipment. This is not true with shooting, and it is not true with glassing. I do believe in good optics, and I genuinely believe that you get what you pay for in optics, but even the very best optics aren’t going to do you any good unless you use them well and properly. Technique is important, but confidence and patience are what really locates game.

A great Coues buck from Chihuahua. I have no idea how far this buck was when first glassed, but I think more than five miles. It takes a bit of luck to see animals at such distances—but if you look long enough and hard enough luck will come along.

Leave a Comment

Hunting Rifle Prep

Getting your rifle ready for a hunt means putting in some quality range time and checking for functionality as well as accuracy.

Over the years I have hunted with a wide assortment of rifles, and I’ve seen all kinds of bizarre problems pop up. Most are fixable, but the most important thing is you need time to fix them. So the first rule in getting ready for a “big hunt,” whatever that means to you, is to plan ahead. Make your decisions on rifles and optics early in the process, so that you have time for at least a half-dozen range sessions before the hunt date rolls around.

The exact zero you choose depends on where and what you’re hunting as well as your chosen cartridge. This .35 Whelen Ackley Improved is zeroed dead-on at 100 yards, a good choice for close-cover hunting.

For most of us this means months, but even if you have a range in your backyard and can shoot every day, don’t think you can cram for the exam. Especially if you’re setting up a new rifle for a hunt, you need time to work out the kinks. But even if the chosen rifle is an old friend, you need to check things out far enough ahead to allow time for a bit of gunsmithing, if needed, or even to come up with a backup plan. This is especially true if you’re going on an international hunt where you need to obtain a firearms permit ahead of time.

The first steps should be taken before you are committed to taking that particular rifle. Start by inspecting it carefully from butt to muzzle. If stocked in wood, are there any cracks? If the barrel is free-floated, as the majority of factory rifles are today, take a sheet of paper and run it between the fore-end and the barrel, making sure there’s clearance where there’s supposed to be. This can change; one of my own favorite rifles developed some warping in the fore-end, and I had to take some sandpaper to the barrel channel to regain clearance. Make sure the sling swivel studs are secure. You’ll need to inspect your sling as well, but sling swivel studs are a common point of failure, and if a stud pulls out (or your sling breaks) your rifle is in for a nasty fall.

Making certain the rifle is empty, check the safety for proper functioning, and check all the screws. Action screws should be tight, but not over-tightened, just good and snug. Scope mounts and scope mounting are among the biggest culprits. If you are mounting a scope yourself, please read the directions and follow them. If a scope is already mounted, then check all the screws. They need to be tight, but over-tightening remains a problem: if you break a scope mount screw, you’re in a pickle.

Scope mount screws need to be tight, and with torque wrenches so common today many instruction sheets suggest exactly how tight. About 30 pounds is usually plenty, and you definitely don’t want to overdo it and strip or break the mount screws.

Now it’s time to go to the range, but that first session isn’t about accuracy. You can work on that later. The first concern is to make sure the rifle functions properly and consistently. Most of us single-load at the bench and that’s OK, but do at least some of your shooting from a full magazine so you can make sure the rifle performs its basic functions of feeding, firing, extracting, and ejecting, every single time. This applies to old friends as well as new ones because it’s always possible for parts to wear or break.

At some point you’ll need to make decisions on the perfect load for the game you intend to hunt, but initially it’s better to try as wide a variety of loads as you can get your hands on. The accuracy of most rifles varies at least a bit with different loads, and some vary a whole bunch. The most accurate load may not be the one you choose. You may opt instead for the performance qualities of a certain bullet that doesn’t print the tightest groups in your rifle, or you may compromise between accuracy and velocity.

On any hunt that might involve long-range shooting it’s wise to check the velocity of the load you intend to use with a chronograph. That’s the only way you can know the real trajectory of your load.

This decision should be based on the game you are hunting. There are usually several perfectly sound options, so it takes a few range sessions to narrow the field. Eventually you will make your choice. You can continue to practice with other ammo that might be cheaper or more available, but once you’ve decided on the load you intend to use, several steps follow. First, especially with the current ammo shortages, make sure you have enough for the hunt, and a bit more for final zeroing. Then inspect every cartridge you plan to take on the hunt. Factory ammo is awfully good today, and I’m sure your handloads are as perfect as mine . . . but I’ve found the occasional crumpled case neck and even an upside-down primer. Take that ammo on your next trip to the range and run every cartridge from the magazine, into the chamber, and out into your hand and back into the box. Now you know all your cartridges will chamber, so set that ammunition aside until you’re ready to pack.

Practice as much as you can. If it’s a hard-recoiling rifle, ration yourself to just a few shots at each range session, but shoot a lot more with a light-recoiling rifle. All shooting is to the good, and there’s no better training tool than a good old .22 rimfire.

A rifle should probably be fired at least fifty times before taking it on a serious hunt, but perfectly good practice can and should be done with a .22. This saves money and also reduces the cumulative recoil you must deal with.

You should always check zero when you get to your hunting destination, but you still want to establish your zero with the load you intend to hunt with at least two range sessions before departure. Where that zero should be is another decision based on where and what you will be hunting. In some cases you may want to be dead-on at 100 yards, but you may choose a 200 or even 300-yard zero. That’s up to you, but don’t leave it until the last range session, and make sure you establish that zero with a cold barrel. By the way, if shooting at longer ranges is likely, check the velocity of your chosen load with a chronograph. That is the only way that you can be absolutely certain of your trajectory.

This is another point in the process where you might consider a backup plan. If it’s a distant “once in a lifetime” hunt, consider setting up a spare scope in rings. I don’t do this all the time, but there have been a couple of times when I’m glad I did. If you use detachable mounts, then the extra scope can be zeroed right along with the primary, but if you take a bad fall or your scope mysteriously falls apart and you decide to switch scopes, you will still need to check zero before continuing the hunt.

On that last range session you can start by checking that zero once more from a cold barrel. Then do whatever shooting you need to do. Hopefully you’ve been cleaning your rifle right along, especially if you’re breaking in a new barrel, but I like to clean the barrel one last time at the end of that final range session. Many rifles shoot to a slightly different point of impact when freshly cleaned, so after cleaning I fire a couple of “fouling shots.” Then I let the barrel cool completely and check zero one last time. Now your rifle should be ready. Hopefully you are as well.

During your initial range sessions with a new rifle try as many different loads as you can get your hands on. Accuracy usually varies from load to load—sometimes significantly—but there are usually several good choices.

Leave a Comment

Savage Lady Hunter

A new rifle engineered for the serious female hunter.

With the introduction of the new Model 11/111 Lady Hunter, Savage Arms is one of the first rifle manufacturers to design a rifle specifically for women. Most gunmakers seem to think a “lady’s” rifle is just a standard rifle with the stock cut down and maybe some pink highlights, but the engineers at Savage consulted with serious women hunters (yours truly included) and discovered that there is a lot more to it than that.

Stock design is key, and they spent a lot of time getting it right. This rifle has an extra-high comb to accommodate women’s proportionally longer neck length, and the way it is sloped makes it easy to get the right view through a scope. Savage also reduced the girth of the pistol grip and moved it closer to the trigger guard. Weight was another crucial consideration. Conventional wisdom said that women want “light” rifles, but Savage discovered that overall weight was not really the problem–the issue was front-end weight. So they went with a shorter (20-inch), lighter barrel and a slimmed-down fore-end, but retained the weight in the receiver and stock. The result is a rifle with handling characteristics I instantly fell in love with–and so, interestingly, did a lot of men who tried it.

The only drawback, for me? Savage designed the rifle with a 12½-inch length of pull, which would be perfect for many women, but at 5’7”, I found the stock too short. Bill Dermody of Savage told me that the company intends to offer spacers that can be easily installed to lengthen the stock for us long-geared gals, which would easily solve the problem.

My test rifle came in .30-06 and shot minute-of-angle right out of the box with 150-grain Federal Fusion ammo. Even with the short stock, it was so comfortable to shoot I could have stayed at the range all day. Other caliber choices include .22-250, .223 Remington, .243 Winchester, .270 Winchester, .308 Winchester, 7mm-08 Remington, and what I think would be the perfect chambering for this rifle, the 6.5 Creedmoor.

The gun weighs 6 pounds and tipped the scale at 7.5 pounds with the Burris 3-10×40 scope I mounted on it. The rifle has Savage’s wonderful AccuTrigger, a detachable box magazine, and top tang safety. And no, there’s no pink (thank heavens) but we ladies do like our stuff to look nice—hence the beautiful oil-finish walnut stock. Congratulations, Savage Arms. You’ve hit it out of the park with this one.

Savage Arms, 413/568-7001
savagearms.com

Leave a Comment

Cape Buffalo Targets

Life-size (and smaller) targets to help you get ready for your Cape buffalo safari.

Photo above courtesy of www.biggamehuntingadventures.com/trophy-hunting-cape-buffalo-south-africa

If you’re planning to take on dangerous game in Africa, it’s very important to practice with your big-bore rifle under the most realistic conditions possible. With this life-size buffalo target, you can set up a training regimen that’s as realistic as it gets. You’ll need the right range setup, but if you have a place for it, this target is the ideal way to get realistic shooting practice with your dangerous-game rifle at the same distances you’ll be shooting at buffalo on your safari. The target is 5 feet high and 8 feet long, and is printed on lightweight, weather-resistant, corrugated plastic board that folds up into five sections.

It comes with two metal posts that press into the ground to hold the target up, as well as eight plastic clips and two bungee cords that hold it upright. The system works reasonably well if there’s not a lot of wind, but if you can attach it to a sturdy plywood or particleboard backing at your range, so much the better.

Once you’ve got the target set up, which takes only a couple of minutes, you can take shots from field positions, including off sticks, standing, kneeling, and sitting. This will give you an excellent idea of what an animal this size will look like in your sights once you are confronted with the real thing.

The target comes with three self-adhesive “shoulder patches” that allow you to replace the target’s heart-lung area once it’s been shot at a number of times, thus extending the life of the target.

2×3 foot “Perfect Shot” buffalo target.

If your range setup doesn’t allow for a large, freestanding target, Safari Press offers several other buffalo targets that are almost as useful for realistic rifle practice. Standard “Perfect Shot” buffalo targets (2×3 feet) can be stapled to any standard target backing and offer a “ghost view” of the animals internal organs on the back, so you can see exactly where your shot would have gone. A life-size version of this paper target, which comes in six pieces, requires a sturdy plywood background for mounting, and also has a ghost-view backing.

The back of the “Perfect Shot” target helps you see exactly where in the vitals your shot landed.

The life-size freestanding buffalo target is $100 plus shipping; standard Perfect Shot buffalo targets are $9.95 for a pack of five; and the six-piece life-size Perfect Shot target is $39.95. All are available from Safari Press.

Leave a Comment

A Ram in Pronghorn Country

The new Ram Outdoorsman is designed to be the ultimate hunting truck. We put it to the test in the New Mexico backcountry.

The parade of five Ram trucks rolled through a ranch gate. On the horizon sprouted a collection of white canvas tipis—an incongruous counterpart to the queue of spotless new four-wheel-drive pickup trucks approaching them across the high plains of eastern New Mexico.

As I stopped the Ram I was driving in front of the camp, shifted into park, and killed the engine, outfitter Steve Jones came out to greet our crew of pickup-truck-driving outdoor writers. Steve, who runs Backcountry Hunts, specializes in hunts for pronghorn, mule deer, and other species throughout Texas and New Mexico, often housing hunters in his distinctive tipi camps.

I hopped down from the cab of the pickup and gathered with the rest of the writers to get acquainted. Our group had come to New Mexico in time for the opening of the pronghorn season, and each of us had high hopes of collecting a good “speed goat.” But the main reason we were here was to test-drive the new Ram Outdoorsman pickup truck and find out how it would perform in a hunting situation.

The Outdoorsman is a new truck introduced for the 2011 model year, and it’s aimed at, well, people like us. In retrospect, it’s not surprising that Ram would design a sportsman-specific truck, since Ram owner demographics illustrate a serious passion for the outdoors: 47 percent are hunters, 57 percent are freshwater fishermen, 33 percent are saltwater anglers, 36 percent own powerboats, and 37 percent tow camping trailers. Overall, 62 percent of full-size pickup truck owners hunt, fish, or camp.

These trucks leave no doubt as to the identity of their target consumer!

I’d already learned a lot about the Ram 1500 on the highway during the three-hour drive from the Amarillo airport; the full crew cab was roomy and comfortable, and the 5.7-liter HEMI V8 engine was smooth, quiet, and powerful. I was especially enamored of the stylish features that added significantly to the comfort and enjoyment of a long road trip: in-dash navigation, satellite radio, and a sun roof that retracted with the touch of a button. But there are plenty of comfortable vehicles on the market, and since these trucks were designed specifically for people who live the sporting life, I was particularly eager to try out some of the features that were billed as making the Ram Outdoorsman the ideal hunting vehicle.

We stashed our rifles and gear in our tipis, and then Ram Truck marketing guru Dave Sowers gave us a quick tour of the truck’s gun-friendly features. I was impressed with the lockable compartment under the back seat that looked perfect for storing a sidearm safely out of sight. But the coolest features, to my eye, were the Ram Boxes—waterproof, lockable storage compartments flanking the pickup bed on either side. Equipped with optional racks called Ram Box Holsters, each box safely and securely holds either two rifles with scopes or six fishing rods. I’ve never liked traditional back-window gun racks (a sure way to invite someone to break into your truck), and the Ram Boxes are an innovative solution that sure beats trying to hold onto a rifle in the cab of a bouncing pickup as you’re driving to your hunting area, or leaving it in the cab in plain view if you want to stop for a bite to eat on the way home.

The Ram Box is a waterproof, lockable storage unit on either side of the truck box. Each box securely holds two scoped rifles when equipped with the optional Ram Holsters.

You can get a Ram Outdoorsman model in any of several variations, including the 1500 (half-ton), 2500 (three-quarter ton), and 3500 (1-ton), and in two- or four-wheel-drive versions. Naturally for a hunting and fishing truck, a Class IV trailer hitch receiver comes standard, and an integrated trailer brake controller also comes standard on the heavy-duty 2500 and 3500 models.

It was hot, very hot, on this late-August day as all of us hunters checked the zeros on our rifles and moved into our tipis. That night, the first of several thunderstorms rolled through and cooled things down, and morning dawned cool and pleasant. My hunting partner, Lisa, and I piled into our assigned Ram truck along with Floyd, our guide, ready to look for some of the exceptional pronghorn this part of New Mexico is known for.

Stalking pronghorn on the open plains is one of hunting’s most enjoyable adventures. With their amazing eyesight and incredible speed, these animals are challenging to hunt, but there were plenty of pronghorn on this sprawling cattle ranch, so even though our first few stalks were unsuccessful, we weren’t overly concerned. It gave us a chance to explore the countryside and put the truck through its paces while covering some ground on the ranch roads.

As you might imagine, the Outdoorsman is designed to handle some tough back-road and off-road conditions. The 17-inch all-terrain tires, designed with optimum off-road tread, have extra-strong sidewalls so they can handle heavy loads and are less likely to puncture. The scratch-resistant steel bumpers hold up to the beatings taken off road as well. A full-size spare tire, tow hooks, heavy-duty floor mats, and fog lights come standard.

These trucks look cool, too. They feature a low-key but good-looking two-tone paint job, and have very little chrome, giving them a look designed to appeal to people who spend a lot of time with nature and are interested in practicality, not garish looks.

It could have been our truck’s low-key looks that caused the pronghorn we spotted in late morning to remain unalarmed even after he spotted us, but most likely we just caught a nice piece of hunting luck. We eased to a stop and glassed the bedded buck carefully. He had chosen his resting spot well, surrounding himself with hundreds of yards of wide-open short-grass plains and not a stitch of cover that might allow a predator to sneak up on him. There was no doubt that getting close to this pronghorn would be a challenge. Floyd and I slipped out of the truck, and I slid a cartridge into my rifle and made sure the safety was on.

We stalked slowly and quietly, hiking at an angle that would close the distance without seeming to. The buck watched us alertly. When at last he stood, I sank to the ground in a sitting position, rested the rifle across my shooting sticks, and squeezed the trigger.

“Great shot!” Floyd said.

We jumped to our feet, eager to take a look at our prize. We were thrilled when we reached him. With 14-inch horns, good mass, and excellent prongs, our buck was a fine example of the outstanding bucks that are so plentiful on New Mexico’s scenic high desert.

The Ram Outdoorsman is designed to get hunters into hunting country. The rest is up to you! I was fortunate to find this beautiful pronghorn during our field test of the trucks on the high desert of New Mexico.

Floyd quickly field-dressed the buck and we loaded him in the Ram. As we boosted the buck into the pickup’s 5’7” box, I noticed that our truck had multi-position bed divider/extender; another very practical feature. You can move the divider to any position in the bed to secure or separate cargo, or drop the tailgate and use it to extend the overall length of the bed. I didn’t spend too much time exploring these options, since we needed to get my pronghorn back to camp where we could skin him out and get him into the cooler as quickly as possible—a crucial chore to ensure the meat wouldn’t spoil in the desert heat.

Lisa shot an outstanding pronghorn that afternoon, and by the end of the second day, everyone else in our group of hunters had filled their tags. With some time to spare, we had a chance to drive the Rams a bit more and put one of them—a special Power Wagon edition with extra off-road capabilities—through its paces, climbing a rocky mesa north of camp. As we got ready to load our hunting gear and coolers of antelope chops into the Rams to head for home, I thought about what I’d learned in a couple of days of hunting out of the Ram Outdoorsman.

This is what we hunters call showroom-ready!

While I’m no vehicle expert, I’ve hunted out of a lot of different trucks in a wide variety of terrain from the western plains to the Rocky Mountains to the eastern hardwoods. In my view, the ideal hunting vehicle needs to do several things well. First and foremost, it should handle well on the rough back roads and dirt roads that generally lead into hunting country. While off-road capability is a plus, most hunters will use their trucks primarily on back roads. The Outdoorsman did everything we asked it to, handling everything from dry, rocky hills to slick, muddy, post-thunderstorm dirt roads to barely visible two-track with aplomb. Oh, and the 32-gallon fuel tank came in handy since we were more than thirty minutes from the nearest gas station and covered quite a few miles on the ranch roads.

Second, a hunting truck should have an interior cab layout that can easily accommodate several people with their daypacks and other gear. The cab should provide both comfort and good visibility. The Outdoorsman’s crew cab covers that base as well, with four full-size doors and plenty of room in both the front and back seat. Six people can certainly ride in the cab, but for true, practical use in a hunting situation, it is very comfortable for four people with their jackets, daypacks, and the like.

Third, a hunting truck should be easy and relatively quiet to enter and exit. As trucks go, the Outdoorsman was easy to get in and out of quickly and quietly. I did discover by the second day that a buildup of desert dust caused the door hinges to creak, but that is a common problem that can occur on any vehicle, and is easily fixed with a quick wipedown.

Fourth, the exterior styling and features should make such a truck practical, durable, and able to accommodate a variety of cargo. It is in this category in particular that the Outdoorsman really shines, as evidenced by the design of the bed, the Ram Boxes, the steel bumper, underbody skid plates, and other features. A lot of thought obviously went into every aspect of the Ram Outdoorsman to make it a practical, useful vehicle for anyone who loves the great outdoors.

Learn more at www.ramtrucks.com/en/2011/outdoorsman/

Trucks and tipis–incongruous? Maybe. But I’ll bet the old-time buffalo hunters would have loved to have a Ram Outdoorsman pickup truck.

Leave a Comment

tablet

Never Miss An Issue!Subscribe Now: 6 Issues for $34.97

More Details
WordPress Video Lightbox Plugin